I'd pay any price just to win you
Surrender my good life for bad
To find you I'm gonna drown an unsung man
Surrender my good life for bad
To find you I'm gonna drown an unsung man
That was a good deal for Pete, but for my son and I decided to make a trade with a pair of our guitars. He gets my rare-and-repaired Jay
Turser Flag and I get his gently-used Mitchell Dreadnaught. I'll come back to
setting up the Mitchell to my likings in a future blog. But, before we could make this
horse trade official, I had a few things to finalize on the Flag.
All of the wood shims I added to the neck joint had finally settled, and the neck joint was shaky at best. After a few minutes of hard playing, she needed to be retuned. Although my son was ready to take her as-is, her action was already too high to adjust by further shortening her saddle height, as her saddle was already trimmed down some. As a result of the high action, her intonation above 9th fret was off just enough to make me want to cover my ears. I really could do without listening to my son play This Old Guitar in this condition, so the first item on the to-do list was another neck reset to increase her neck-to-body angle. That would allow me to replace her used saddle with a new one, while leaving some room for future action adjustments as the new shim in the neck joint settles.


With some yellow glue and the new shim in place, I applied pressure with a pair of bar clamps. After cleaning up the squeeze out glue with some water, I left the assembly to allow the glue to dry overnight.
A few touches with a chisel, some filing and some sanding took care of smoothing out the rough edges and trimming them flush to the rest of the heel.
After some trimming to both flat surfaces, it was time to check and adjust the new neck shim. This new bone saddle is just over a full 1/16-inch taller than her old tusq saddle at the middle and has a larger radius that better matches her fretboard.

Before putting the screws back in, I clamped her neck in place and checked the projection along the centerline of her fret crowns to her new saddle with a straight edge. It was lining up just below the tip of the saddle.

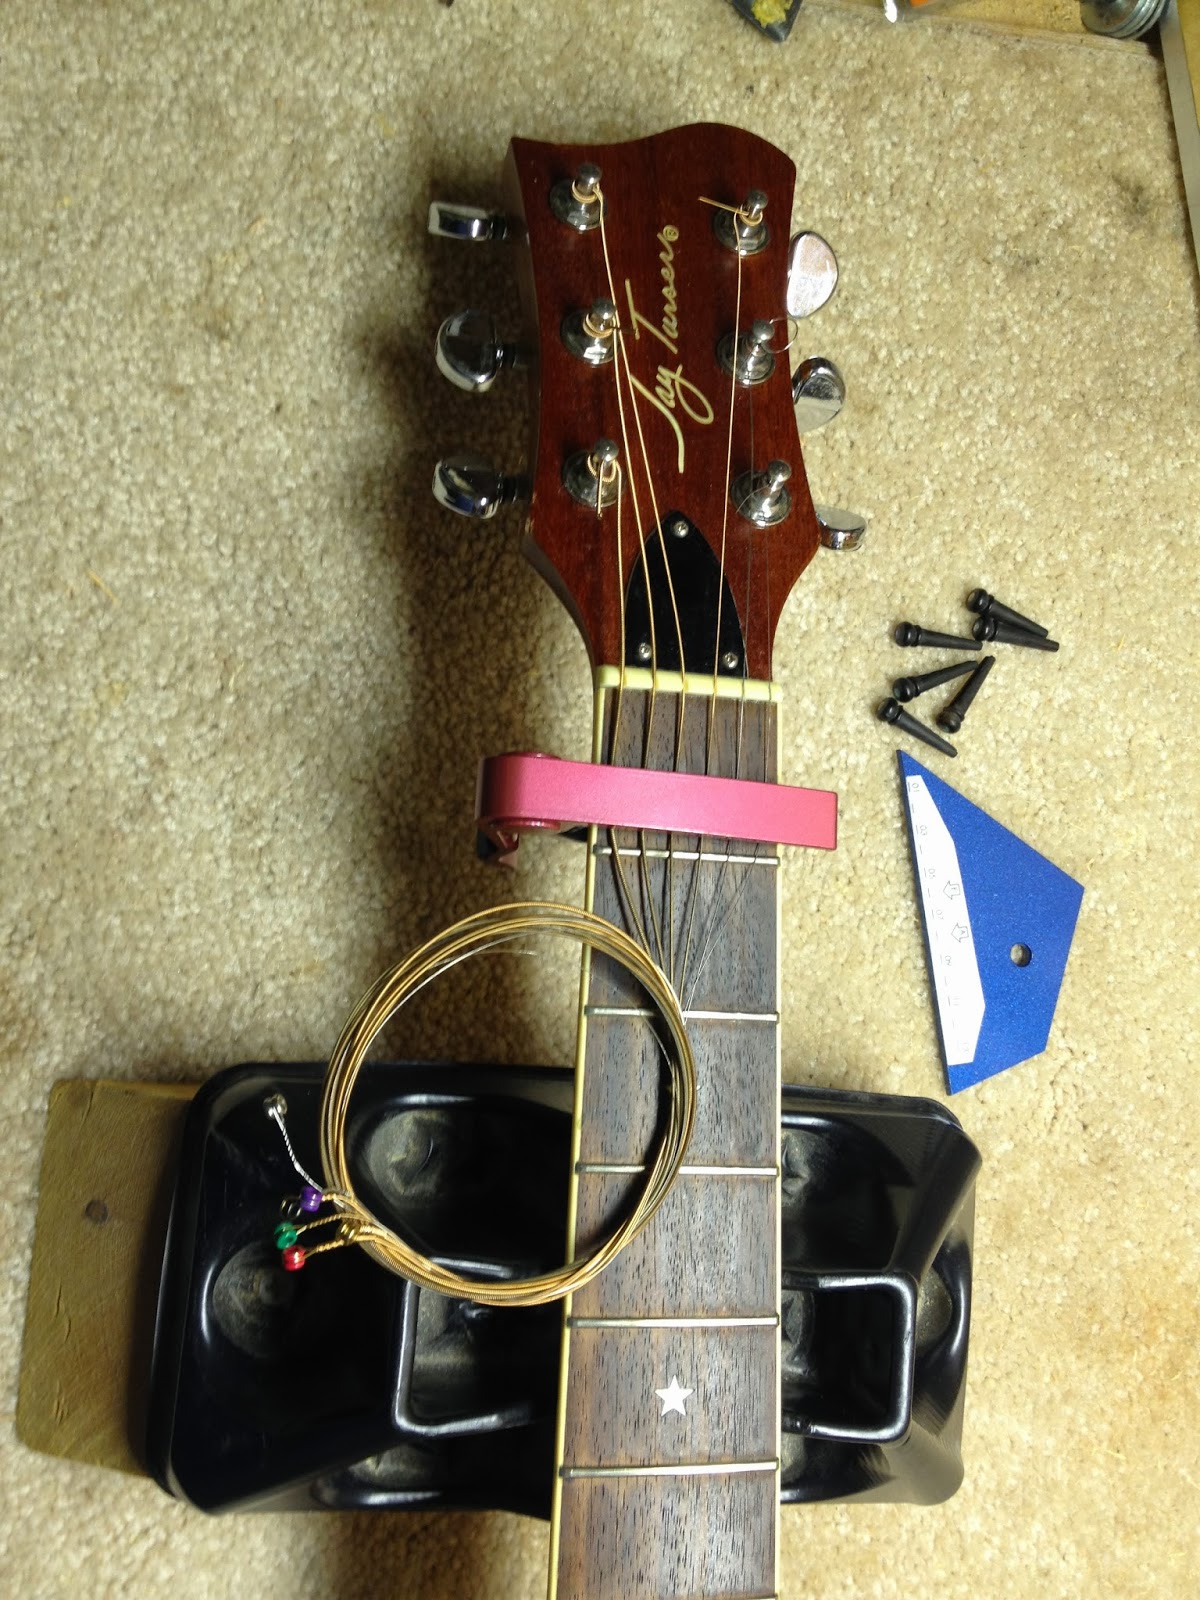
Pleased with how the projection looked, I restrung This Old Guitar. BTW, here's how I use a capo to save and reuse a set of strings during repair work. She'll get a new set of strings when I'm done adjusting the neck set angle and saddle height.
With her neck reattached and her strings in tune, I used a combo fret rocker / string height gauge to check her 12-th fret action and used my digital tuner to check her intonation.


Her action was still higher than the target 0.08-inch, measuring up at 0.13-inch on her low E and 0.10-inch on her high E ...


...and that was making her intonation slightly off, and just a bit more on the bass side than on the treble side. All in all, it was an improvement and a good starting point for adjusting the new shim and saddle.


After a few minutes with a sharp chisel, I reassembled the neck, put the strings back on and put her in tune. Despite the change in neck angle, I found her action was even worse than before. I also noticed that her fingerboard was not sitting as close to her body as it was before, and had a hunch her four neck screws were no longer holding the joint tight enough. I took the strings off at her bridge again and checked a critical measurement.

Although it would have been possible to fill in the screw holes to repair the connection, the shim I added left very little depth for the wood screws to engage the wood. A better solution would be to use longer screws.

An even better solution would be to use brass inserts and machine screws.

A set of deep grommets would also allow me to recess the bolts into the body. I gathered the hardware and left them laid out for the next morning.
Before putting the screws back in, I clamped her neck in place and checked the projection along the centerline of her fret crowns to her new saddle with a straight edge. It was lining up just below the tip of the saddle.
Pleased with how the projection looked, I restrung This Old Guitar. BTW, here's how I use a capo to save and reuse a set of strings during repair work. She'll get a new set of strings when I'm done adjusting the neck set angle and saddle height.
With her neck reattached and her strings in tune, I used a combo fret rocker / string height gauge to check her 12-th fret action and used my digital tuner to check her intonation.
...and that was making her intonation slightly off, and just a bit more on the bass side than on the treble side. All in all, it was an improvement and a good starting point for adjusting the new shim and saddle.
After a few minutes with a sharp chisel, I reassembled the neck, put the strings back on and put her in tune. Despite the change in neck angle, I found her action was even worse than before. I also noticed that her fingerboard was not sitting as close to her body as it was before, and had a hunch her four neck screws were no longer holding the joint tight enough. I took the strings off at her bridge again and checked a critical measurement.
Although it would have been possible to fill in the screw holes to repair the connection, the shim I added left very little depth for the wood screws to engage the wood. A better solution would be to use longer screws.
An even better solution would be to use brass inserts and machine screws.
A set of deep grommets would also allow me to recess the bolts into the body. I gathered the hardware and left them laid out for the next morning.
No comments:
Post a Comment