Like a fine wine, some musical instruments get better with age. Sometimes, due to age, neglect and abuse, older guitars needs some work and TLC to be returned to playable condition. This blog documents some of the work I have performed on musical instruments for myself and others over the years.
Groovin',on a Sunday afternoon,
Really couldn't get away too soon
It was a beautiful Sunday afternoon. After a busy week and taking care of a few other things around the house, it was Sunday evening by the time I got back to this bass neck repair. The glue from work I did last week to the back of the neck was plenty dry. A little sanding was next.
After using some #100 grit to take off the bulk of the excess, I touched things up with some #220 grit and moved on to filling in the end of the truss rod groove.
With the truss rod in its new position at the nut end, I measured the length that needed to filled in at the heel end.
A 1/2-inch thick piece of oak was just the right width for filing in the groove.
After a half hour of trimming and sanding, the infill piece was ready to be cut to final length.
With some glue and a few clamps in place, it was time to call it a night.
While waiting for the weather to cool off again, I decided to order a replacement nut for this neck. As the headstock is black, and I had already bought a set of black tuners for her, I thought a black tusq nut would look and feel so right. So, I took some measurements and found one on eBay. When the nut arrived, I was disappointed to find it was not wide enough to fill in the dado.
Although I could have filled in the gap, the dado is only about 3/32-inch deep into the headstock, so leaving even the slightest gap from side to side would result in a weak joint. With the amount of tension carried in a set of bass strings, I wanted to be sure the the nut fit snugly into the slot. So, back to eBay I went, only to find that no one was offering any black nuts in the size that fits this neck. Instead, I ordered an ivory-colored plastic nut. With some light sanding, the ivory nut fit the slot, as snug as a bug in a rug.
Since the crack along the back of the neck behind the lower frets did not appear to be very deep, a little bit of glue and some matching wood should be enough to fill it in. I prepared a workstation by taping down a pair of furring strips to a scrap 2x6. I intentionally left a gap between the two furring strips, to allow the neck to bend slightly from clamping pressure.
Using some more tape, I attached the neck to the workstation.
Using a hobby knife, I trimmed open the crack just enough to be able to insert some wood slivers.
After filling the crack with glue, I filled in the opening with wood. The truss rod channel was a good donor for this material.
I filled the crack enough so that some wood stood proud of the area, to be trimmed flush later.
Using a caul with a pair of clamps, I applied some pressure to the repair and left the glue to dry overnight.
You know the day destroys the night
Night divides the day
One of the project necks I picked up in a lot sale of three necks awhile back was for a bass guitar.
I probably can count on two hands the number of times I've held and played a bass guitar, including my repairs to a coworker's Washburn Lyon. Still, I am intrigued by the instrument, and for the price I paid for the lot, it was like getting the bass neck for free.
By adding a bridge and saddle set, some tuners and a pre-wired
pickguard, all it would take to make a prototype would be a body and few
more bits and pieces.
Getting back to the neck, the front looked good and had no signs of damage or distress. The truss rod seemed to be working fine, considering I could easily produce back bow in the neck with a few turns of an Allen wrench. So far, it seemed to be the best one of the lot.
The back side revealed the reason this neck was on a repair bench. A 1-1/2inch long crack at the lower frets with no other signs of damage was a bit mysterious. Could that crack go all the way through to the truss rod cavity? The only way to find out was by having a look at the other side, underneath the fret board.
A longer scale length doesn't make a difference in how I released the glue holding a fretboard to a neck. Since the body-joint end of the fretboard was cut flush with the end of the neck, I started from the headstock end. After applying some heat, I was able to get things started at the truss rod cavity with a 5-in-1 painters tool.
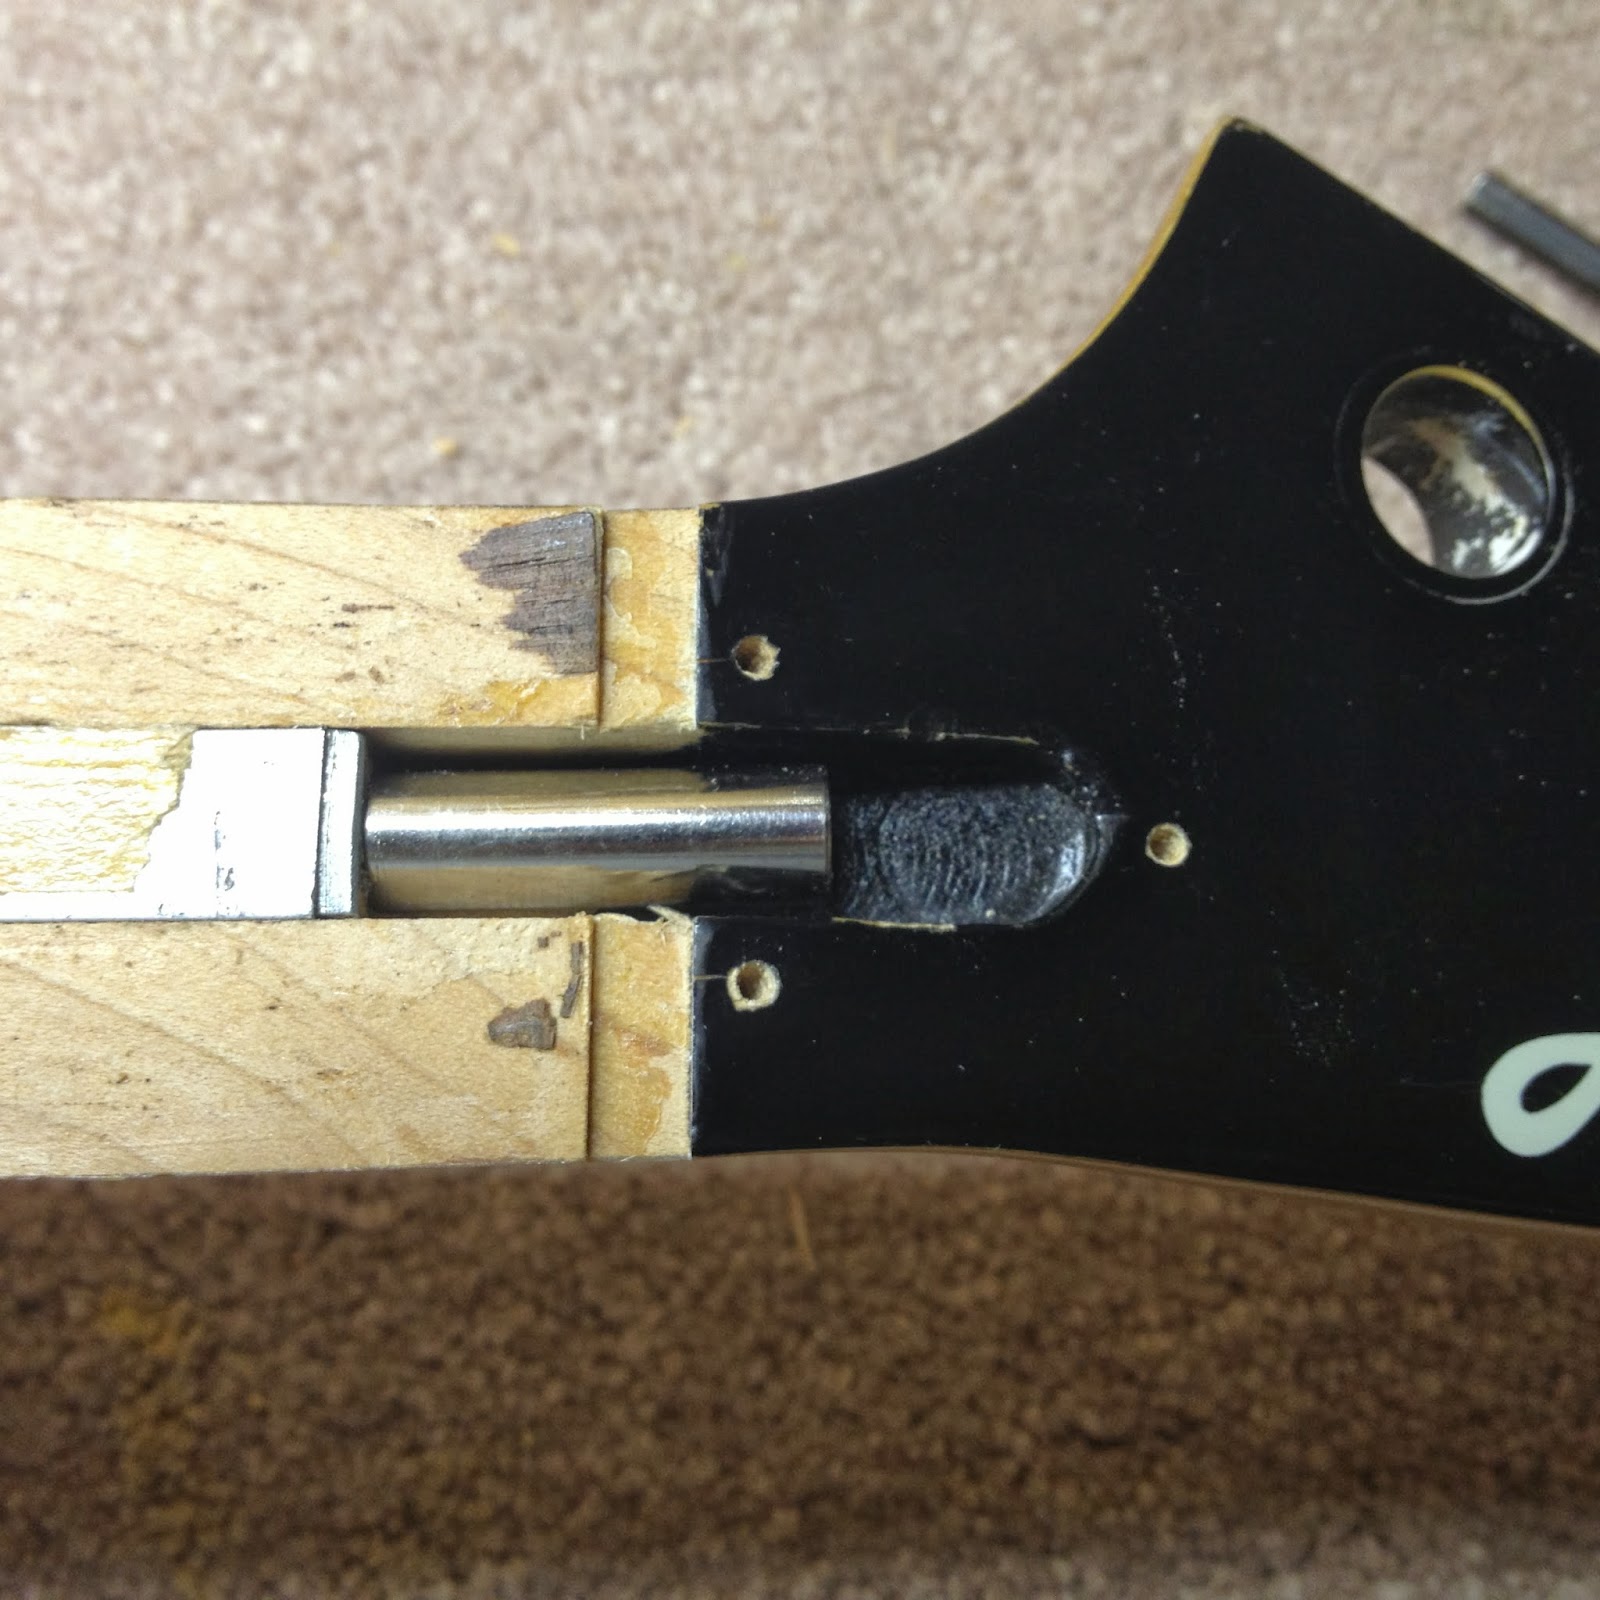
After about a half hour, I got my first look at the inside of this neck and her one-way truss rod.
Although the Martin-style truss rod is fine, it seems to have been involved in cracking
the neck at the 1st fret. You can see an impression in the truss rod cavity, where the smooth, round surface of the adjusting nut has been in contact with the wood. The
heat of the iron I used to release the glue must have resulted in the
toasted look of the impression. That must also have been where the nice aroma was coming from when I was working at the lower frets...
So, the good news is that crack in the neck is not all the way through to the truss rod cavity, and it is repairable with some
glue and clamping, followed by some sanding and finish touch-up on the outside. As for why the neck cracked at all, I'm guessing it was a combination of things. First, the neck has a very slender profile, and the location of the crack is at the weakest point of the neck. Add to that the pressure of the end of a tightened truss rod, and it wouldn't take much to do some damage over time. Finally, and this is just a guess, is that a misguided attempt to affect the neck set angle by over-tightening the truss rod resulted in damaging this neck.
I would like to do something to get a better distribution of the force into the neck to
help avoid cracking at the back of this very slender neck. This could be done by either using a longer truss rod, or filling in the first 1-1/4 inch of the truss rod cavity at the body-joint end. Either way will put the adjustment nut so far into the headstock that it will not be possible to cover it. Since this is going into a prototype build, I am opting to shorten the cavity at the body-joint end and use the existing truss rod. Hopefully, the weather will cooperate so I can spend enough time in the shed to rebuild this bass neck over the weekend...