Tuesday, June 26, 2012

Jay Turser JTA-Flag300 - Riot In Cell Block No. 9

There's a riot goin' on
Up in cell block number nine.


A few weekends ago, I turned my attention back to the neck block.  The plan was to clean out all of the plastic, epoxy, or whatever Jay Turser used in the dovetail joint.  The Dremel sanding and cutting tools I had were not up to the task, so I made a quick trip to the store for a couple of new attachments.  After a few minutes of grinding, I saw how far I needed to go to get down to the wood.


After about a half hour, I had cleaned out all I was going to take out of the neck block.  After a few more minutes with a rough flat file and some sanding, it was looking like half of a a dovetail joint again.  Time to return to the neck heel.


After cleaning out the neck block, I decided to abandon the idea of converting the dovetail joint into a simple tenon joint, and decided to try building up the heel to make the dovetail.  As it is such a shallow dovetail, it might not be able to resist the tension force of the strings wanting to rotate the neck upwards and out of the joint.  That's where the bolt comes into play.  More about that after I get the heel built up and reshaped. 

Here are some shots from the past few days along the journey of getting clever with quick-clamps and oak to rebuild the heel.  Since wood has non-isotropic properties, I was careful to orient the grain of the new pieces to be parallel to the length of the neck to provide the highest strength value in compression.


Next time, I'll start shaping the neck heel into a dovetail tail so it will fit into the endblock.

Wednesday, June 6, 2012

Harmony H1203 Sovereign - How Can You Mend a Broken Heart

I can still feel the breeze
that rustles through the trees
And misty memories of days gone by.


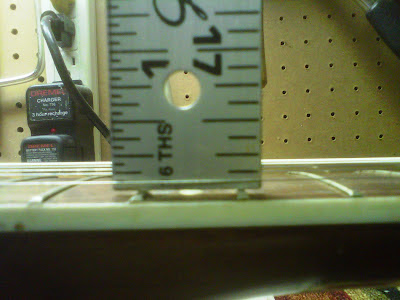
The answer to the question the Brothers Gibb asked in this song sure wasn't a neck reset, but that's all this old guitar needed to get her high action and intonation under control.  With the latest set of oak shims attached to the heel, and very little sanding, I placed her neck back.  The dovetail joint closed up better this time, leaving no sign of a gap at the heel cap.  With her saddle in place, I laid a straight edge across the upper frets to check the projection at the saddle, and found that it was just under a 1/16 of an inch below the top of the saddle.


I restrung her and checked that same projection with each sting I added, and noticed a little change with each string.  With all six strings on and tuned, I was very pleased to find the projection only increased to about 1/8 of an inch.  I was even more pleased to find that her action was at 1/8 inch on the bass side and 1/16th of an inch on the treble side.


She played nicely and didn't need a truss adjustment at this point.  Although her action was a bit more than I would like on the low E side, there was still plenty of height left in the saddle to allow for dropping that side down to 3/32 of an inch.  I decided to leave that for next time, after letting her acclimate to the conditioned house air for at least a day to be sure her neck joint was stable.  So, I moved on to addressing a simpler problem.

All that work resetting the neck, although great for reducing her action, left a good-sized pie shape gap between the high end of her fretboard and her already sunken front panel.  Besides the aesthetics, I was worried that gluing the end of the fretboard to the front panel would stress the fretboard and binding to the point of cracking at best, lead to problems with the 14th and 15th frets being loose, and that it would leave a very obvious gap between those two frets. 


The solution I came up with was to install a shim between the top plate and the end of the fret board.  I took measurements and found that the original bridge plate was just the right thickness for making the shim.  That also seemed an appropriate way to make use of an original part of this old guitar.  After cutting and gluing up two pieces to get the width I needed, I tapered the shim on one side with a belt sander to match the profile of the gap.


When the shim fit, I traced the outline at the fretboard.  Using a coping saw, I cut the shim down to size.


With some sanding around three edges, the shim was done for now.  I left enough wood for final sanding during reassembly, and put the shim aside before putting this old guitar back in the house.  After two nights with no change in action, I do dare to call this reset a success!  This left just enough time to play a few songs before putting her and myself to bed for the night.

Monday, June 4, 2012

Harmony H1203 Sovereign - Won't get Fooled Again


Pick up my guitar and play
Just like yesterday
And I'll get on my knees and pray
  We don't get fooled again


If things happen for a reason, it's a good thing I didn't do that lacquer touch up on the front just yet.  After only a day indoors, her neck joint started failing and the action almost doubled.  The intonation past the 4th fret was totally unacceptable, so I had no choice but to remove the neck again and give the reset another try.  After using the old reliable clothes iron with a pair of metal putty knives to release the glue between the fingerboard and body, I made a simpler, kinder and gentler neck removal jig from a scrap piece of stair tread and a few pieces I salvaged from the first jig.


With a little steam from my Wagner steam machine and a few turns of the wing nuts, the neck slid out nice and easy.  After a little cleanup of the wet hide glue with a rag, I left things to cool off overnight.


After gluing some thin shims to the neck heel side of the joint and some more sanding, I was ready for another attempt.  My hunch was that the top plate was deflecting at the bridge from the string tension.  This time, I decided to hold off on using the glue, so I could take some measurements at the bridge after a day or so, and put the strings back on.  I measured the 12th fret action before and after playing her for an hour or so, and found the action was holding just under 1/8 of an inch.  I also noticed a slight gap at her neck heel and body.  I let her sit until the next day and, just like last time, found that her action had grown to over 1/8 of an inch and her intonation was unacceptable again.  I also noticed there was a bit of relief in the neck.  After flattening it out with a few tweaks of the truss rod, the action came back down to just under 1/8 of an inch and the intonation returned to an acceptable level.


Noting that the nut and saddle could stand to be trimmed some, and that I was still planning on restringing her with 10-gauge strings, I felt a little better about the way things were going.  I took a close look at the heel and noticed the gap that shouldn't be there was also just a bit wider.  It was still under 1/16 of an inch, but way too large.  Before taking the neck off to work on the heel gap, I set up a makeshift device with a level for a flat edge and stacks of fender washers for measuring the top plate deflection at the bridge.


With the strings in tension, it took 10 fender washers at each end of the straight edge for the level to clear the high point of the bridge, leaving about a 1/16th of an inch gap.  With the strings unwound, producing no tension, the gap between the bridge and the straight edge was virtually unchanged.


Since the top plate was not deflecting from the string tension, the only thing remaining that could have led to the change inaction was sloppiness in the dovetail joint.  Knowing that, I glued some more thin shims at the tip of the neck heel end of the joint and left them to dry overnight.

Saturday, June 2, 2012

Jay Turser JTA-Flag300 - Too Tight


Baby, don't get too tight with me
Yes, you're far too tight for me.


The plan to tighten up this neck joint is to install a nut insert in the neck heel that will receive a bolt through the neck block.  Adjustment of the neck angle will be made by shimming the joint.  The bolt will have a hex end so it can be tightened with a socket through the sound hole.


Since there's only enough room for one bolt into the neck and block, I'm rebuilding the neck joint to get as good a fit as possible.  I cleaned up the dovetail joint some last time, and moved on to the neck heel repair.  I started by cutting and sanding just enough of what was left to make it level.


Next came fitting up a piece of oak.  I left it slightly large so I could sand it smooth after letting the glue dry.


Before calling it a night, I took some measurements for the bolt and nut insert.